6/11/10

Lovely Lemon Tart


Two of my favorite flavors are raspberry and also lemon.  I tasted this Lemon Tart recently and was at once awed by it's wonderfully tart lemon flavor and silky texture.  Although it uses cream cheese, it is not as heavy or intensely cheesey as cheesecake.  I guess that is why it is called a tart!  At any rate, I immediately asked for the recipe and would like to share it with you.

Lemon Zest Tart

Crust:
1 cup unsifted flour
1/2 cup butter
2 Tablespoons powdered sugar

In a food processor, mix together the flour, butter and powdered sugar until particles are fine.  Pat into the bottom and sides of an 11-inch flan pan, with scalloped sides and removable bottom.  Bake at 425 degrees for 10 minutes, or until lightly browned.  (Watch carefully so it doesn't get too brown)

Filling:
1 package (8 oz) cream cheese
3/4 cup granulated sugar
3 eggs
2 teaspoons grated lemon peel
1/2 cup freshly squeezed lemon juice
Meanwhile, beat the cheese until creamy and beat in the granulated sugar, eggs, lemon peel and juice.  Pour into baked tart shell and place in freezer for 5 minutes.  Bake at 350 degrees for 20 minutes, or until set.  Let cool and chill.  Serve with crushed and strained frozen raspberries sweetened and thickened to make a sauce.  Drizzle on top and add a dollop of whip cream and a mint leave for garnish.  Yum!
Check out all the other delicious foods at Designs by Gollum here.

6/8/10

Thrift Store Gift Idea

Do you ever need just a little something to give as a gift for a friend to tell them you are thinking about them, to wish them a speedy recovery or a happy day?  Here's an idea I recently saw on a local TV show.
Take a thrift store cup and saucer (I found these for 50 cents apiece)
Tie onto the handle a some assorted ribbons--these were mostly scraps I'd saved from presents received.
Buy or make a pretty cupcake--I purchased this one from my grocery store for $1.29
Put the cupcake into the cup. 
Add a coordinated paper filler to the saucer.  
I didn't have any pink filler so I just used ribbons.Place the cup on top of the filler.
Add a card. 
Wrap it all in cellophane and give with a smile.  This is just one suggestion for filling the cup.  What other ideas can you think of to use this idea?
I am linking up to Tutorial Tuesday with today's post.  Visit here for more ideas and how-to.

6/7/10

Simple Woman's Daybook


I am thinking...It is going to be a beautiful day!
I am reading...  The Wednesday Letters by Jason F. Wright.  I friend highly recommends this book and gave a copy to me so it is next on my list.
 
I am hearing...
A chorus of birds outside my window.  I know they are as happy as I to have the nice weather and sunshine.  They especially love our new rainfall.

Around the house...
I want to put up some plaques I made to label the rooms down a hallway today.

One of my favorite things...
Is eating which has some negative results.  I will try to do better this week.

A Few Plans For The Rest Of The Week...
I will be taking care of my grandchildren beginning Saturday for a few days so that will be fun.  I know that one thing on their list is going to the pool!

Here is picture thought I am sharing...

Last day of preschool.  Pioneer Party

 Don't forget to hop on over to the Simple Woman to check out the other day book entries! (Or better yet, do a simple day book entry yourself! It's not that hard and I am betting you would enjoy it!)


6/3/10

Brazilian Flan

I recently attended a cooking class where a darling Brazilian cook, Tania, showed how she makes Flan.  With her casual, carefree spirit she made it look so easy a child could make it.  It is very simple with only 4 ingredients.  It turned out beautifully and delicious!
Brazilian Flan
For the caramel:
Melt 4 Tablespoons sugar until it is caramel color.  Pour into a teflon bundt pan.  When it is hard, make the milk mixture:
Put into a blender:
1 can sweetened condensed milk
1can whole milk (use the sweetened condensed milk can for measure)
2 eggs
Blend together then pour on top of the hardened caramel  sauce.  Put bundt pan in a water bath--(fill a rimmed cookie sheet with water then place bundt pan on top.  Bake at 375 degrees for approx 45 mins or until a kitchen knife comes out clean.
Fast, easy and delicious!
Enjoy!
I am linking up to Designs by Gollum's Foodie Fridays.  Check out other delicious recipes here.

6/1/10

Birthday, Bunnies and a Rolling Ball

Here's a recap of a fun Memorial Day celebration in Idaho.  
You just never know what will happen in the country.
We started off by celebrating this cute girl's birthday at home. 
She started to put her own candles on her cake.

She ended up with lots of help with those candles!

Then we took that party to a restaurant where the fun continued.
Cute birthday hat!
Do you want some fun?  Add five little, soft bunnies and 7 cousins to make a happy time.
He does not want to give any of these adorable babies away!
The next door neighbors call to share this fun human rolling ball. 
All children run for the adventure they see in store for them.
They think this is a great way to work off their newly eaten BBQ dinner.
Next it is time to bring out the craft supplies--old T-shirts to cut out circles.
After time we've made a fitting Memorial Day red, white and blue banner for the mantel and
lots of cute hair bands for everyone.
It was a great time for lots of family bonding.
I hope your weekend was adventure-filled too!

5/28/10

Minny's Caramel Cake


If you have read the very popular book The Help by Katheryn Stockett you are familiar with Minny's famous Caramel Cake.  Minny would make it for her friends that needed a little TLC or just to be neighborly.  Our book club recently reviewed this wonderful book and then for dessert we had this Caramel Cake that I am just sure is just like Mini's:).   How can it not be the most delicious thing you have eaten when it consists of 4 candy bars?!  I hope you will enjoy it too.
 Minny's Caramel Cake
"Layer cake make with candy bars, frosted and drizzled with melted caramel. M-m-mmmm!"

Ingredients

  • 2 cups cake flour
  • 1 teaspoon baking powder
  • 1/8 teaspoon salt
  • 3/4 cup shortening
  • 1 1/2 cups white sugar
  • 1 1/2 teaspoons vanilla extract
  • 1 cup milk
  • 5 egg whites
  • 4 (2.15 ounce) milk chocolate covered caramel and nougat bars

Directions

  1. Preheat oven to 375 degrees F (190 degrees C). Grease and flour two 8 inch round cake pans.
  2. Sift cake flour and combine with baking powder, and salt. Set mixture aside.
  3. With and electric mixer, beat shortening, sugar, and vanilla until fluffy. Add flour mixture and milk alternately to the shortening mixture.
  4. Beat egg whites until stiff peaks form. Fold egg whites into flour mixture then fold in chopped candy bars. Pour batter into prepared pans.
  5. Bake at 375 degrees F (190 degrees C) for 20 minutes. Let cakes cool in pans for 10 minutes then remove from pans. Drizzle with melted caramel if desired.
I am linking up to Foodie Friday for this post.  Please check out other delicious recipes and ideas at Designs by Gollum here.

5/24/10

Summer Look--White slipcovers

I realize in this creative blogging world of make-everything-yourself-for-only-pennies that one is somehow substandard if a thought of purchasing, not making it yourself, enters one's mind.  And I do know the satisfaction that only comes with completing a project I have made myself, after all, I have touted the merits of whole wheat bread made from fresh ground hard red wheat, and used to spend all of August making new wardrobes for each of my children before they entered school etc, etc.  I am the one who can save a dime because I will tell myself how "I can make that" at a boutique when I see something cute.  Now, whether or not I actually end up making a copy of that same thing is another question.  But, let it be said, I have spent many years creating everything you can image.
So, I know I have the skills to master slipcovering my two red sofas.  And now that all the world knows that I am capable of doing just that, I want to show you my new white slipcovers for those sofas that I willingly paid someone else to make for me!
I just love them!  I thought about starting to make one sofa.  And when I did, these feelings of frustration began to surface!  They did not go away, and only got worse.  I just knew it would be a project I would loath!  And the thought of having to make two of them almost put me over the edge.  I have wanted these couches covered for 7 years and one day recently I came across this blog: http://customslipcoversbyshelley.blogspot.com/ with her name and phone number.  The phone number had my area code! Was this a sign?  I thought so.  Then I called Shelley and my house was close enough to hers for her to take my job.  Horray!!  It was my lucky day.  She told me how much fabric I needed ,and where to get it, and her price.   I couldn't believe it, I found the fabric for $3.99/yd. I decided to let her make my two sofas, plus a chair and an ottoman too. I put 50 yards of this wonderful white denim in my washer to preshrink it (8 yards at a time).
A week after I found her blog Shelley was at my house cutting and pinning it to my furniture.  I watched and was amazed with the skill and speed she had.
  I also thought how different my approach would have been to the project and the frustration that would have involved.  In two hours she left and two weeks later brought back my beautifully tailor made white slipcovers.
Nothing has made me so happy for a long time.  I guess I have put too much emphasis on "material" things, but everytime I walk into or past my family room I feel like summer has come to my home and I smile.
 Of course I did not realize that I would have to change my rug, pillows and accessories to match my new look.  But, it was worth it in every sense.  They are just wonderful.  Now, I have time to craft something less complicated.  Right now I am breathing in the aroma of fresh baked bread!   Thanks Shelley!!
I am linking to Susan's Between Naps on the Porch for her Metamorphosis Monday makeovers. Check out what other bloggers have been doing too.

5/21/10

I am featured today on Tip Junkie!

I am so excited!  I am featured on Tip Junkie today for an invitation idea I posted for Memorial Day and 4th of July celebration ideas that I posted about last year.  You may remember if you are a regular reader.  Check it out. I posted several days and had lots of ideas. Here is the link to my posts Celebrating Red, White and blue  I am glad I did all those great red, white and blue party favors, decorations, invitation and food last year because I will be celebrating in Italy this year!  Check out Tip Junkie's blog Tip Junkie's blog for lots of fabulous ideas for more celebrating and a big hug to her for including me in her picks for today!! 

5/17/10

Me and ME in St. Louis-4

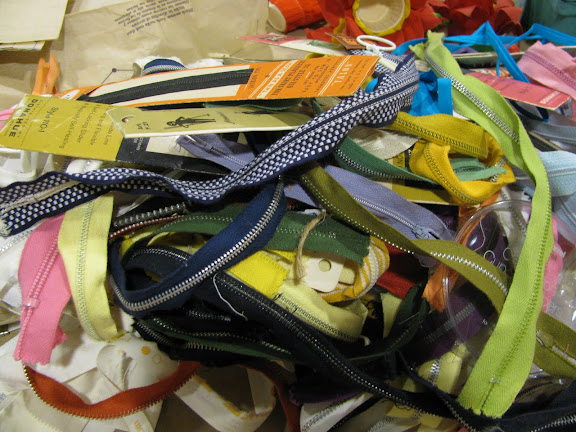
At the Mary Englebreit Workshop held in St. Louis were the most amazing displays of creative and artistic supplies including vintage items and ephemera.  I took a few pictures of the classroom tables awaiting the participants selections for use in making their class items.  How could anyone go wrong with this assortment of wonderful supplies?

It was a crafter's dream to be able to use at free will any and all of the magnificent supplies brought by each teacher.  Many of them were vintage finds!  I was awed away by the selection. They were truly eye candy to us. Here are some of the bounteous tables awaiting our classes.


It was so exciting seeing each person make something complete her own using many of the same items.  Added to the things that each person brought with them there was an abundant supply for everyone.


The last day Mary provided an interesting panel discussion with some very prominent women in the creative field.
 Amy Butler--known for her colorful fabric patterns and designs,
Dena Fishbein (Dena Designs) whose tiny flowery prints we find on cards, fabrics and other small items,
Marcia Ceppos who told us how her grandfather began Tinsel Trading by buying the military trims from the army uniforms and then storing them in his basement.
And of course Mary who began drawing at an early age and without any formal art education has made her name famous for her many drawings of children and sayings she puts with them. Each woman told of her humble beginning into the world of creativity and offered advice for each of us.
Besides the classes, much information was given to us at seminars entitled "Artistic Licensing" and"DIY Craft Fairs"

In all, it was an experience that I will likely never forget. 
 
I made friends, shared working together, made sweet memories and even had time for sweet treats. Thanks Mary for giving all of us this wonderful sweet time together!