4/26/10

Made it Monday

Here is a fun, fast idea I want to share today.  If you have a birthday or just want to give a little surprise this tiny sack will hold your small gift.
It is made from a toilet paper roll.  Flatten the empty roll with a rolling pin or other heavy object to get really flat folds.  I adhered the ball fringe to one end and stapled it in several places on the edge.  Cut paper to fit around the roll and lap over in the back (approximately 6" x 6".  I used another strip of paper about 1" x 6" at the top to finish the top edge.  It is cut with decorative scissors on one long edge.  The other long edge is left straight to match up with the top edge of the tp roll.
Punch a small hole on each side where the fold of the t.p. roll.  Thread wire into the two holes and twist the ends together.  Decorate each side where the wire is with ribbons and tags.  I printed each person's name on the top band.  Now it is ready to fill with special items. I haven't decided what to put in them yet.
A small bouquet of flowers would be nice.  A candy bar would fit in it or an assortment of candies like M&M's.  Something long and skinny would fit.  What would you fill one with?
I am linking up to Persimmon Perch and her Make it Mondays with this post.  Visit here to see what other bloggers have been up to this lately.

4/21/10

What Happens Behind the Scenes

Have you ever wondered what goes on behind the scenes of a production, whether it be a big production or a local television production?  Lately I have had the opportunity to go behind the stage to take a look at both. 
Our local theatre on the University campus was making costumes for their upcoming 42nd Street production when the call for help came to me.  I volunteered to help out.  I was able to see how it all begins with the design for a costume.
Isn't this the most darling dress?  It makes me want to live in that era just so I can twirl in it! 
 
Of course, there must be a very talented designer who can do this and who also helps in the costume department afterward to make sure every detail of his designs can be implemented.  The day I was there I was taught by this designer how to place, one by one, small swarovski crystals (120 of them per pair!) on the pants of the eleven tap dancers.  It took about half an hour per pair! (I can't wait to see the play and those crystals sparkle!)
 
 After the design is drawn, then the pattern has to be made by hand--usually on Kraft paper.
 
The fabrics are chosen.  Sometimes unusual fabric is used.  I watched a curtain, which had been white but had been dyed orange, being used for part of one of the dresses.
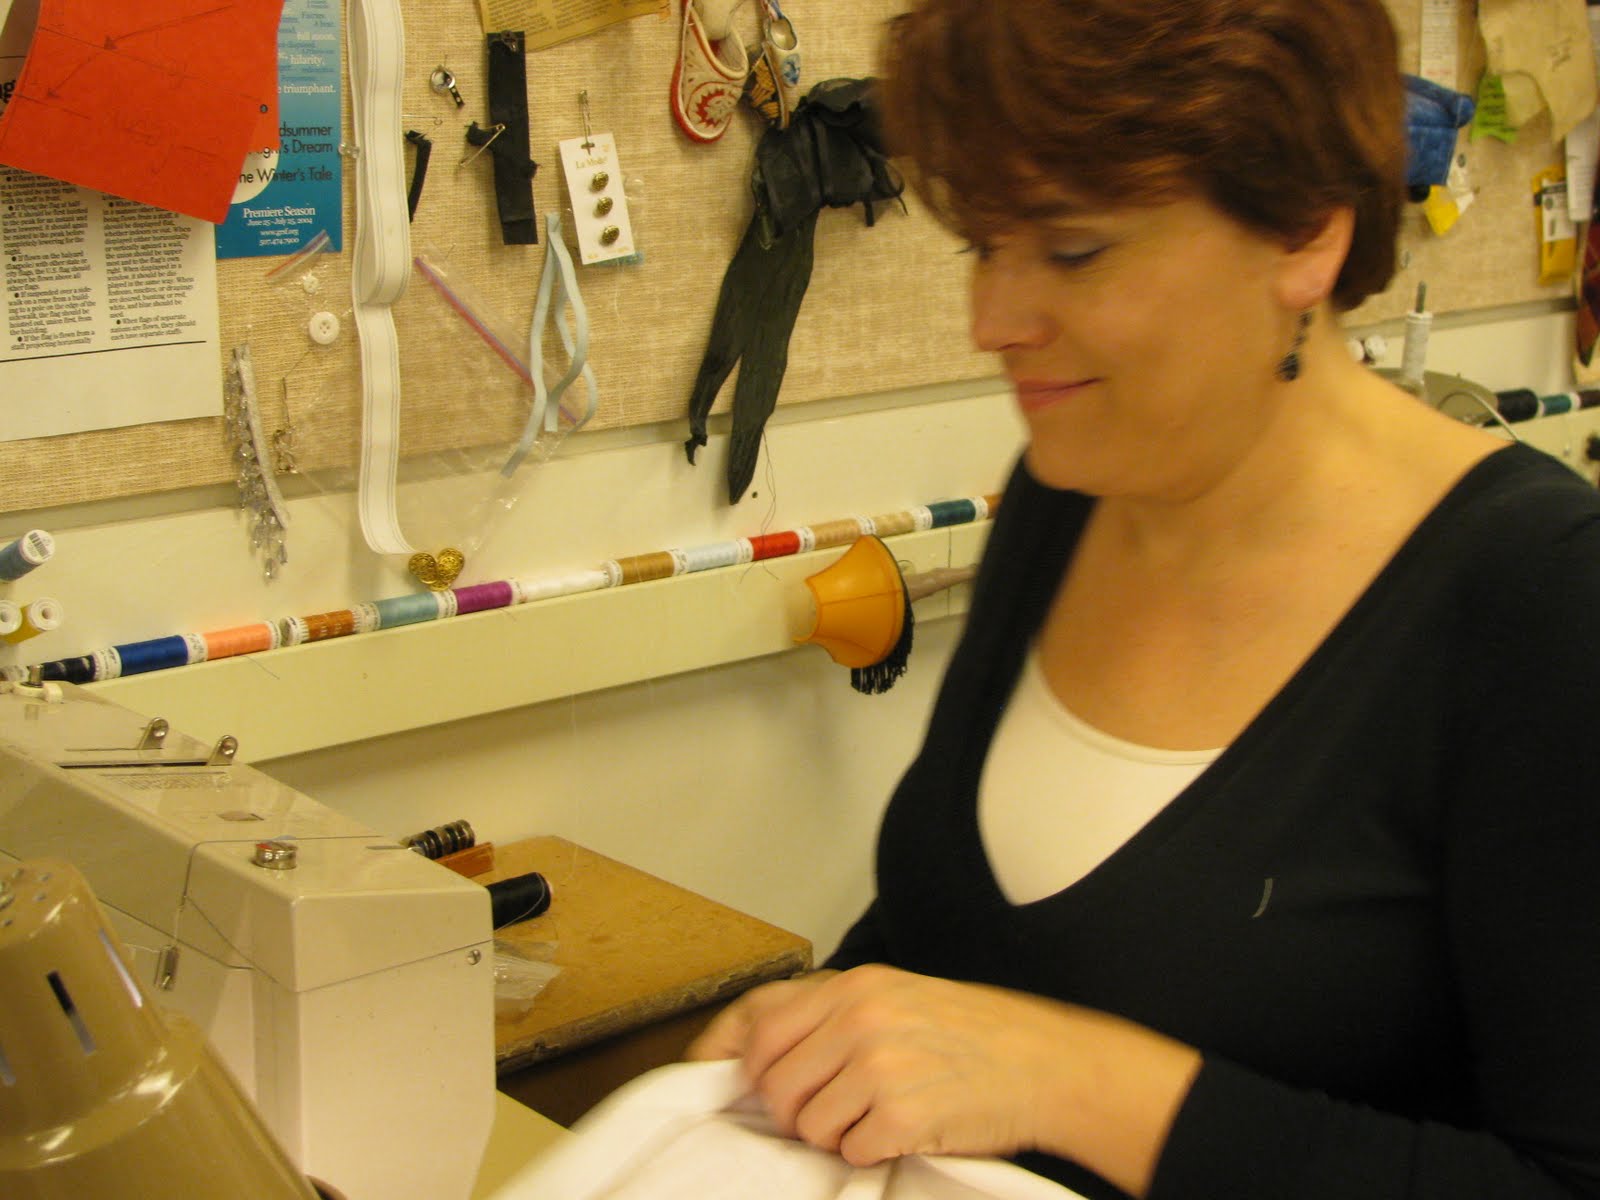
Then the sewing begins.  This room was lined with sewing machines.   There were regular sewing machines, commercial ones that sewed with lightning speed, serger machines and racks and racks of thread, notions, scissors,  ironing boards of every size and shape and lots of mannequins.
 
It was fun to see all the talented people all enjoying working on their part of the production.  There was also a milliner from New York making the hats that were needed for this play.
 
I asked them what happened to all the costumes after the play and was told that they are all stored.  Some of them are used again as they are or they are altered to the specifications of the next play.  In the meantime, they all have a home in a very large room and sorted according to category.  Here are about 400 belts on one rack.  Actually I need a gray skinny belt.  I bet I could have found one or two on this rack!
Another day I was on the set of a local TV program and got to see and visit with the camera men there and watch them set up each camera for the different segments of the show.  They were a happy bunch doing what they love.  Each segment is thought through and scripted, usually by an intern, as to what order each part will be taped and when the commercial break will occur.
There was a whole back room filled with props for display.
Of course, the participants have lots to do before the TV show to make the items which they will present.  These are a few of my daughters items for her segment on doilies.
 
Then the camera man has to prepare the guest with her microphone.
 
The displays need to be set up just right for the cameras.
 
Finally the taping begins and the studio is quiet.  Then, the segment is over in less than 6 minutes!
I have learned to appreciate and understand that what we see the hour or two while being purely entertained, took many people many hours of preparation before then.  Don't we live in a wonderful land where all this can happen just so our lives can be happy and fuller?
 

4/19/10

Flower-Topped Cake

We have a "pound" cake store here where one can buy their cakes that are decorated with a creamy white frosting that seems to drip down the sides.  They come in regular size (large) and mini (small) size.  The center of them,which is really a hole, is then decorated with a flower.
They look wonderful and the price is also pretty steep.  
Saturday at a class, I learned how to make a similar version of the small size by using a small bundt cake pan from Nordic Ware and a cake mix.  The frosting was a cream cheese recipe and using a pastry bag without any tip for the round single drip or a small round writing tip for smaller drips.
We topped them with a small gerber daisy, packaged them in cellophane with a ribbon that matched the color of the daisy. ( Doesn't anything look spectacular and special when packaged in cellophane?  I love it!)  Our little package looked great and expensive and would make a great little birthday surprise for anyone.  It was an easy fun project that anyone could do.  It was especially easy because our little mini bundt cakes were already made for us by a very nice teacher.  This would be a great gift for--
Happy Spring, Happy Birthday, Just Because You're You, I Love You! 
(Now, I just have to get the Nordic Ware pan:)
I am linking today to the Persimmon Perch for Made it Mondays

4/14/10

Tablescape Thursday--April Showers

A lovely Spring Luncheon was held with the theme of April Showers.
  The tables were decorated with lovely and colorful small Chinese lanterns from San Francisco's Chinatown.
Beneath each umbrella were three potted Primroses dressed in bright tissue paper.
One was on it's side, one elevated above the others and on sitting upright on the table.
They all were grouped closely and held up the handle of the umbrella.  It was a lovely sight with all the colors both of the flowers and the hand painting on each umbrella.
Little cocktail umbrellas were used on each person's glass too.
The Peppercorn Beef with  roasted potatoes and asparagus was delicious and enjoyed by all followed by a wonderful cheese cake and fruit sauce.
I am linking up to Tablescape Thursday and Foodie Friday today.  Check them out for lots of great table and food ideas.

First Sign of Spring!

First flower of Spring
I can hardly believe it!  After our snowfall Monday and then the thaw on Tuesday, look what appeared in my yard.  I am so happy.  I will care for it, nurture it, sing to it and cuddle it from the cold.  I am so happy to see Spring in my yard.  It has been a long and cold winter. 
Horray for new growth and bulbs that bring this sunny yellow cheerful delight !!!

4/8/10

Spring Pastels


This table was set for Easter brunch in an array of pastel spring colors beginning with the lavendar tablecloth. The scalloped plates in two shades of rose, celadon blue, melon green, colbalt blue, and lavendar, were purchased from the Syracuse China outlet many years ago. 
The pale green luncheon plate with white polka dots served as the holder for the chocolate and chow mein noodle bird's nests.  A small bird was perched on the edge of the plate guarding it's nest.
 I really wanted some lovely napkins at Pottery Barn but at $8.00 each I resisted.  These napkins had all the colors of the table in them and were purchased at World Market for 2.99 each.
The centerpiece as well echoed spring to all the diners. For a tutorial see my last post.
For a bit of whimsy- hanging from the chandelier was colorful paper wind mills in colors that continued the spring theme.
 
  Small cocktail umbrellas added the finishing touch to the glasses
Happy Spring!!
I am linking up to Thursdays Tablescapes today.  Be sure to check out the other lovely tabletops for great ideas.

4/6/10

Spring Flower Centerpiece Tutorial

I just wanted to share an easy way to make a centerpiece.  This one is for Spring as some of us are still waiting for it to happen in our yards!  So, you can bring those lovely spring flowers into your home now and then plant them in your yard when the weather gets warm enough (hopefully that will be soon).  So, here's the tutorial:
 Begin with your container.  I started with a large ceramic bowl which is 23" in diameter and I guaged the amount of flowers needed to fill it.  If you have a smaller one, you could probably use less flowers.
 Next line it with some greenery. I  had to use some fake greenery for filler but it you can cut some from your yard you are lucky enough to have green in your yard.
First add the tallest plants in the center of the bowl..  Mine are white bleeding hearts that I found at Home Depot while I was there buying some light bulbs.  I purchased three bleeding hearts, (which are biennial) in 6" pots for $6.00 each.
Next I added four azaleas.  I placed them on their side so that the flowers would flow up and over the side of the bowl.  I purchased these at my grocery store in their flower section ($5.50 each).


Next you need some filler plants.  I  picked up 3 pots of chives at about $3.00 each at Home Depot.  It is nice to have the variety of textures. This grass-like texture shows up next to the small leaves of the azaleas and because these pots were biodegradable and kind of pliable it was easy to squish them to fit in areas that needed a filler.

 This is an overhead shot of all the plants in the bowl.  You can see each pot and its rim which isn't very attractive.
The finishing item is the green sheet moss that is added to hide the pot rims, dirt and any gaps left .  You could use spanish moss as well. Be sure to mist the whole thing every day to keep it moist.
This spring bowl was the centerpiece of our Easter Brunch and will continue to add beauty in the center of my table until I can transplant them outside.